
Broomfield Wood Flooring handles hardwood floor staining in Broomfield, CO, serving surrounding cities including Lafayette, Northglenn, Louisville, Westminster and Superior. Across more than 20 years of sanding and finishing, we have never chosen a floor color from a brochure: stain samples go down on your own sanded boards, in your own light, so the color you approve is the color you will live with.
Stain changes a room more than almost any other floor decision, and it is the one that is hardest to judge in advance. The same stain looks different on red oak, white oak and maple, under morning light and lamplight, and in a matte finish versus a glossy one. Our job is to make those differences visible before the floor is committed, then to apply the chosen color evenly across the whole floor.
Choosing A Stain Color For Your Floor
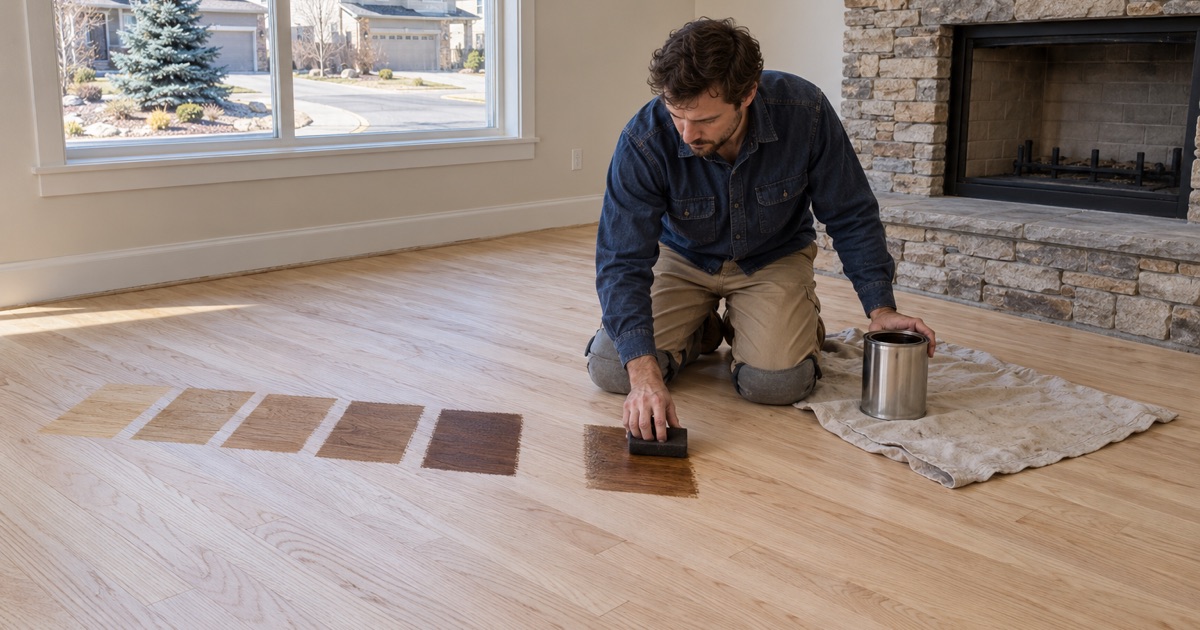
Stain Samples In Your Own Light
After the floor is sanded, we lay several stain samples directly on your boards, usually in a spot that gets both daylight and evening light. You can look at them at different times of day and next to your walls, cabinets and furniture. A color that seemed warm on a showroom chip can read orange on your oak, and a gray that looked soft can turn cold, so seeing it in place matters.
How The Species Changes The Color
Red oak has a pink undertone and an open grain that absorbs stain deeply, which makes browns rich but can make cool grays look muddy. White oak has a more neutral base and takes gray, natural and brown tones evenly. Maple is dense and absorbs stain unevenly, and hickory shows strong natural color variation that stain can soften but not erase.
Natural, Light, Gray And Dark Tones
Natural and light finishes show the wood itself and hide dust and scratches well. Gray-leaning tones suit many newer interiors but depend heavily on species. Dark browns look dramatic and formal but show dust, pet hair and scratches more readily. We talk through how you live in the house as well as how the color looks on the day it is finished.
Getting Even Color From Sanding To Stain
Sanding Sets Up The Stain
Stain magnifies every sanding mark. Skipped grits, swirl marks from an orbital sander and chatter from a drum sander all show up as dark lines or patches once color goes down. We work through the grit sequence without shortcuts and inspect the floor under a raking light before staining, so the surface is ready to take color evenly.
Water Popping For Darker Colors
Water popping means lightly wetting the sanded floor to raise the grain before staining. It opens the wood so it absorbs more stain, giving darker, more even color and reducing the difference between areas sanded by different machines. It is a useful step for dark stains on oak, and we decide whether to use it based on the samples.
Applying And Wiping Stain Evenly
Stain is applied and wiped in manageable sections so every area gets the same contact time with the wood. Working in a consistent pattern, keeping a wet edge and wiping off the excess at the right moment prevents lap marks where one section overlaps another. Around the edges of rooms, we take care that the color matches the field rather than framing the floor in a darker band.
Stain Problems And How We Avoid Them
Blotchy Color
Blotchiness comes from wood that absorbs stain unevenly, most often in maple, birch and some softer species, or from uneven sanding. Careful sanding, water popping or a conditioner, and lighter colors all reduce it. When a species simply resists even staining, we will recommend a natural finish rather than fight the wood.
Picture Framing At The Edges
Picture framing is a darker or lighter band around the edges of a room, left where an edger sanded differently from the main drum sander. It is avoided by blending the edge work into the field with an orbital sander before staining. Catching it at the sanding stage is far easier than correcting it after the color is on.
Orange Oak And Older Stains
Many oak floors from past decades were finished in golden or honey tones under oil-modified polyurethane that ambered over time, turning them orange. Restaining starts with a full sanding to bare wood, then a new color chosen from samples, and a finish that will not keep pulling the floor toward yellow.
Stain And Finish Working Together
Waterborne Versus Oil-Modified Finish
The finish over the stain changes the final color. Oil-modified polyurethane adds warmth and continues to amber with age, which can push a gray or natural stain toward yellow. Waterborne polyurethane stays clear and keeps cool tones true. We choose the finish with the stain in mind rather than treating them as separate decisions.
Sheen Changes How Color Reads
A matte or satin sheen level makes stain look softer and more natural, while semi-gloss and gloss deepen color and reflect more light. The same stain can look noticeably different under two sheens, so we show samples with the finish you are considering when the difference matters to you.
Low-VOC Products In Colorado
Colorado Regulation Number 21 and the federal rule at 40 CFR 59 Subpart D limit the volatile organic compounds in architectural coatings, including many stains and floor finishes. We use products that meet those limits, and waterborne systems in particular keep odor low while you stay in the house during the work.
- 20+ Years on Wood Floors
- Moisture Readings Before Repairs
- Stain Samples on Your Own Floor