
Broomfield Wood Flooring takes on hardwood floor repair in Broomfield, CO, serving surrounding cities including Lafayette, Northglenn, Louisville, Westminster and Superior, and we begin every repair by finding out why the floor failed. Twenty-plus years of floor work have taught us that a crack, a squeak or a loose board is usually a symptom, and a repair that ignores the cause simply comes back.
Most floors do not need to be replaced to look and feel right again. A few damaged boards can be cut out and new ones woven in, squeaks can be silenced at the fastener or the joist, and gouges and dents can be sanded or replaced so they vanish into the surrounding wood.
This page covers the repairs we make most often, how we replace boards so they blend, the process we follow from diagnosis to final coat, and the repairs that depend on the house around the floor, from winter gaps to subfloors and stairs.
Hardwood Floor Repairs We Handle Most
Squeaks And Popping Boards
Squeaks and popping boards come from movement: a board rubbing a fastener, two boards rubbing each other, or a subfloor shifting on a joist. We walk the floor, mark each noise, and check from below where there is access. The fix might be refastening the subfloor, adding flooring cleats, or shimming a gap over a joist.
The cause matters because the fixes are different. Glue squirted into a seam from above rarely silences a subfloor problem, and adding fasteners through the face of a board that is simply dry and loose treats the wrong layer, so we identify which one is moving before we put anything into the floor.
Cracked, Split And Checked Boards
Cracking and checking show up as fine splits along the grain, most often after a dry winter or near a heat register. A single cracked board is replaced; a floor with widespread checking is telling us the house air is too dry, and we talk through relative humidity before replacing boards that would crack again.
Gouges, Dents And Pet Damage
A gouge from a dropped pan, dents from furniture legs and scratches from pets can often be sanded out on a solid floor with enough wood left. Deep gouges and dark pet urine stains usually go through the board, and replacing that board is cleaner than trying to hide the mark with filler and stain.
Loose Boards And Hollow Spots
Boards that move underfoot or sound hollow when tapped have lost their fastening or their bond to the subfloor. Nailed floors are refastened, and glue-down floors can often be re-bonded by injecting adhesive. We tap and map the hollow spots first, so the repair covers the full loose area and not only the one board you noticed.
Board Replacement That Blends Into The Floor
Matching Species, Width And Thickness
A replacement board has to match more than color. Red oak and white oak look different once finished, strip widths vary between builders, and a board that is slightly thicker or thinner leaves a ridge. We measure the existing boards and source matching stock, including the same tongue and groove profile, before any cutting starts.
On prefinished floors, we look for the same product line and color, and on older site-finished floors we match the species and width and let stain and finish handle the color. When nothing matches, boards salvaged from a closet or under an appliance often make the best patch.
Weaving Boards Instead Of Straight Cuts
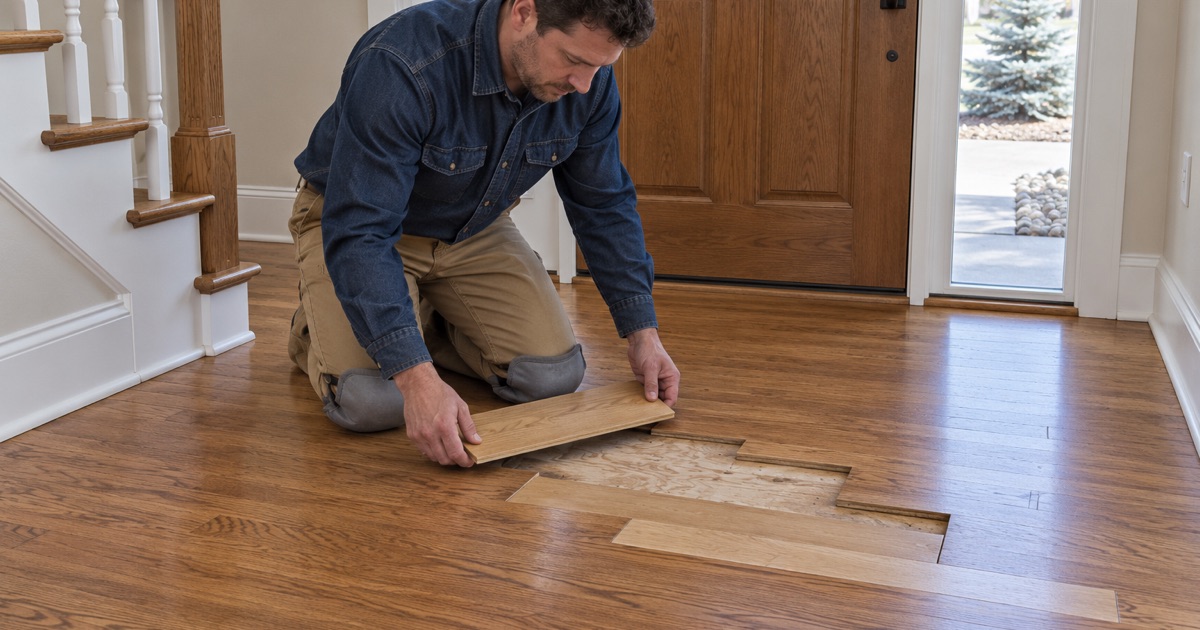
Replacing boards along a straight line across the floor leaves a visible seam forever. We weave new boards in by staggering their ends to follow the pattern of the existing floor, which is slower but lets the repair disappear once it is finished.
Blending The Color And Finish
On site-finished floors, new boards are sanded flush and stained to match the aged color around them, which often takes test samples on scrap first. Where the old finish is worn or has ambered, blending one patch is hard, and sanding and finishing the whole room gives a far more even result.
Our Step-by-Step Hardwood Floor Repair Process
Step 1: Diagnosing The Cause
We inspect the damage, take moisture meter readings, and check the subfloor where we can reach it. A split board next to a leaking dishwasher and a split board from dry winter air look similar but need different repairs, so the cause is settled first.
Step 2: Fixing What Caused The Damage
If a leak, a loose subfloor or dry air caused the damage, that is corrected before new wood goes in. Replacing boards over a problem that is still active wastes the new material and your money, and it usually leaves you calling us again within a season.
Step 3: Replacing Or Refastening Boards
Damaged boards are cut out without harming their neighbors, new boards are fitted with their tongue and groove intact where possible, and loose sections are refastened with flooring cleats or staples. Fastener placement follows the NWFA Installation Guidelines so the repaired area moves with the rest of the floor.
Step 4: Sanding, Staining And Finishing
On site-finished floors, the repaired area is sanded flush through the grit sequence, stained if needed, and finished to match the sheen level of the surrounding floor. On prefinished floors, the replacement boards arrive finished and need only final cleaning and a check of the edges.
Repairs Tied To The House Around The Floor
Winter Gaps: Repair Or Wait
Board gapping that opens during the furnace season is usually seasonal shrinkage that closes by summer. We measure the gaps and the moisture in the wood before recommending any repair, because filling a seasonal gap causes more damage than the gap itself when the boards swell back.
Gaps that stay open through summer, or that concentrate in one area, are a different story. Those can point to a floor that was installed too wet, fasteners that have loosened, or a moisture source below, and they are worth tracing before they are closed with slivers or new boards.
Subfloor And Joist Problems
Some floor problems start below the wood. A subfloor panel that has delaminated after an old leak, a joist that has sagged, or panels that were never fastened properly all show up as soft spots, dips and noise. We check what can be reached from a basement or crawl space and repair the structure before the finished floor.
Transitions, Thresholds And Stair Edges
Worn reducers, cracked thresholds and loose stair nosing take a lot of traffic and fail before the field of the floor does. We replace them in matching species and finish, and on stairs we check the riser height so a new nosing or tread keeps every step even.
These small parts are also where trips happen, so they are worth fixing promptly. A loose nosing on a busy staircase or a threshold that has lifted at a doorway can be replaced in a single visit, and matching the wood and sheen keeps the repair from looking like an afterthought.
- 20+ Years on Wood Floors
- Moisture Readings Before Repairs
- Stain Samples on Your Own Floor